> For the complete documentation index, see [llms.txt](https://docs.amesa.com/llms.txt). Markdown versions of documentation pages are available by appending `.md` to page URLs; this page is available as [Markdown](https://docs.amesa.com/tutorials/industrial-mixer/deep-reinforcement-learning.md).
# Deep Reinforcement Learning
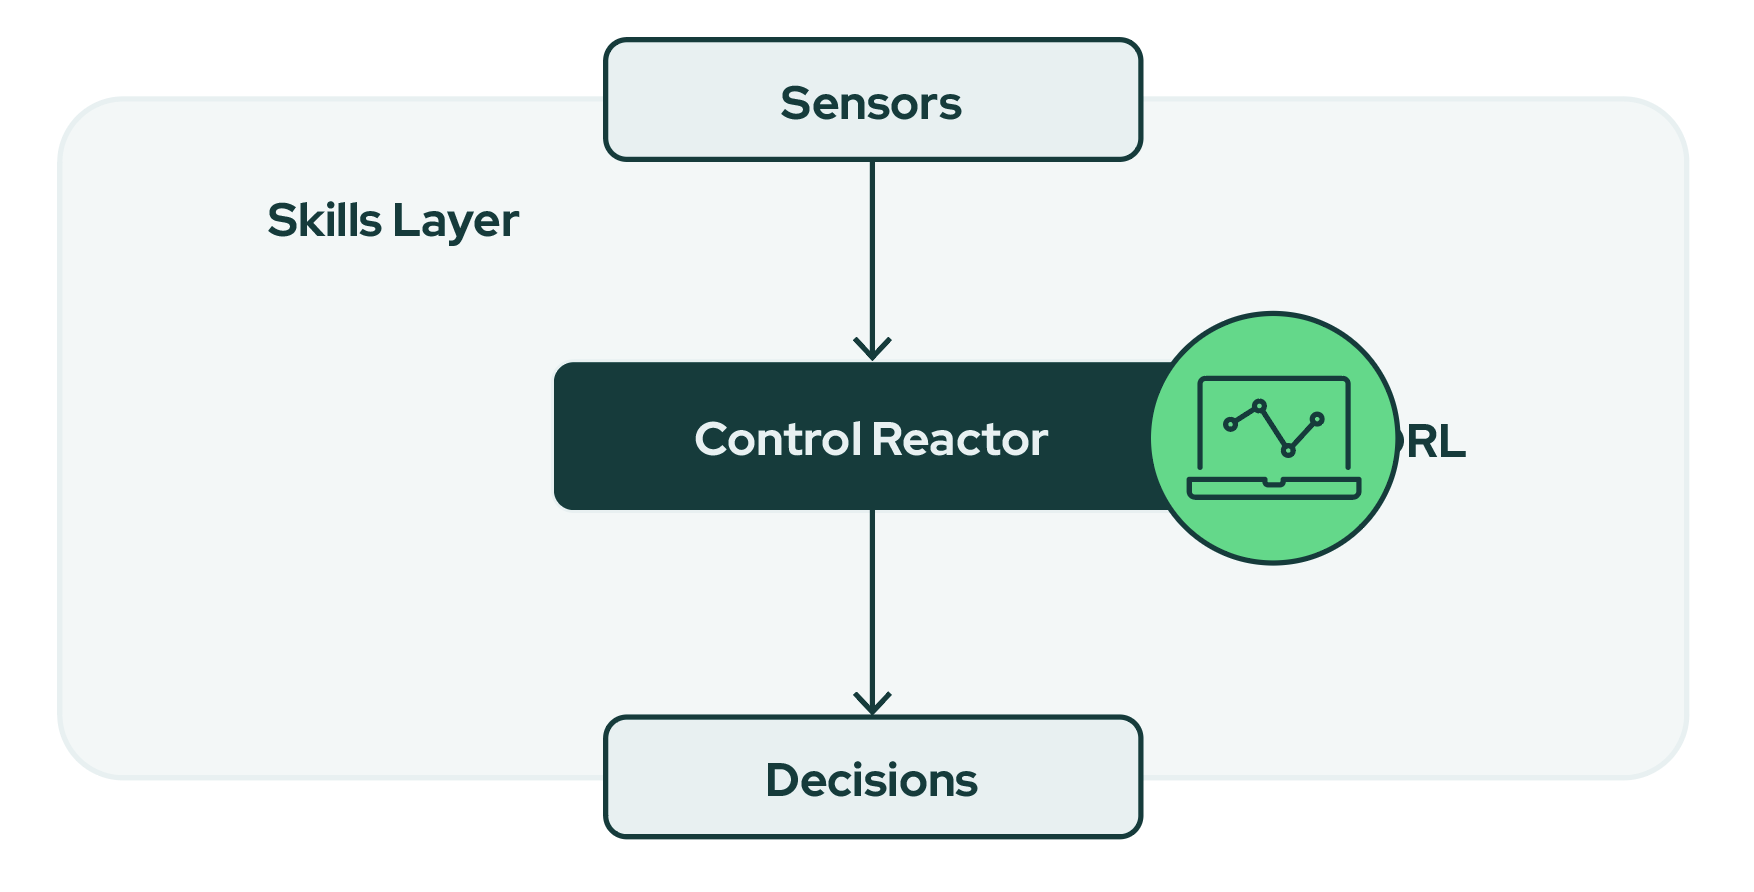
The DRL agent system is a simple design with only one skill agent. This agent system does not use machine teaching to decompose the task into skills that can be trained separately. Instead, the entire reaction is controlled by a skill agent trained with deep reinforcement learning.
Let's get started!
## 1. Create your first skill agent
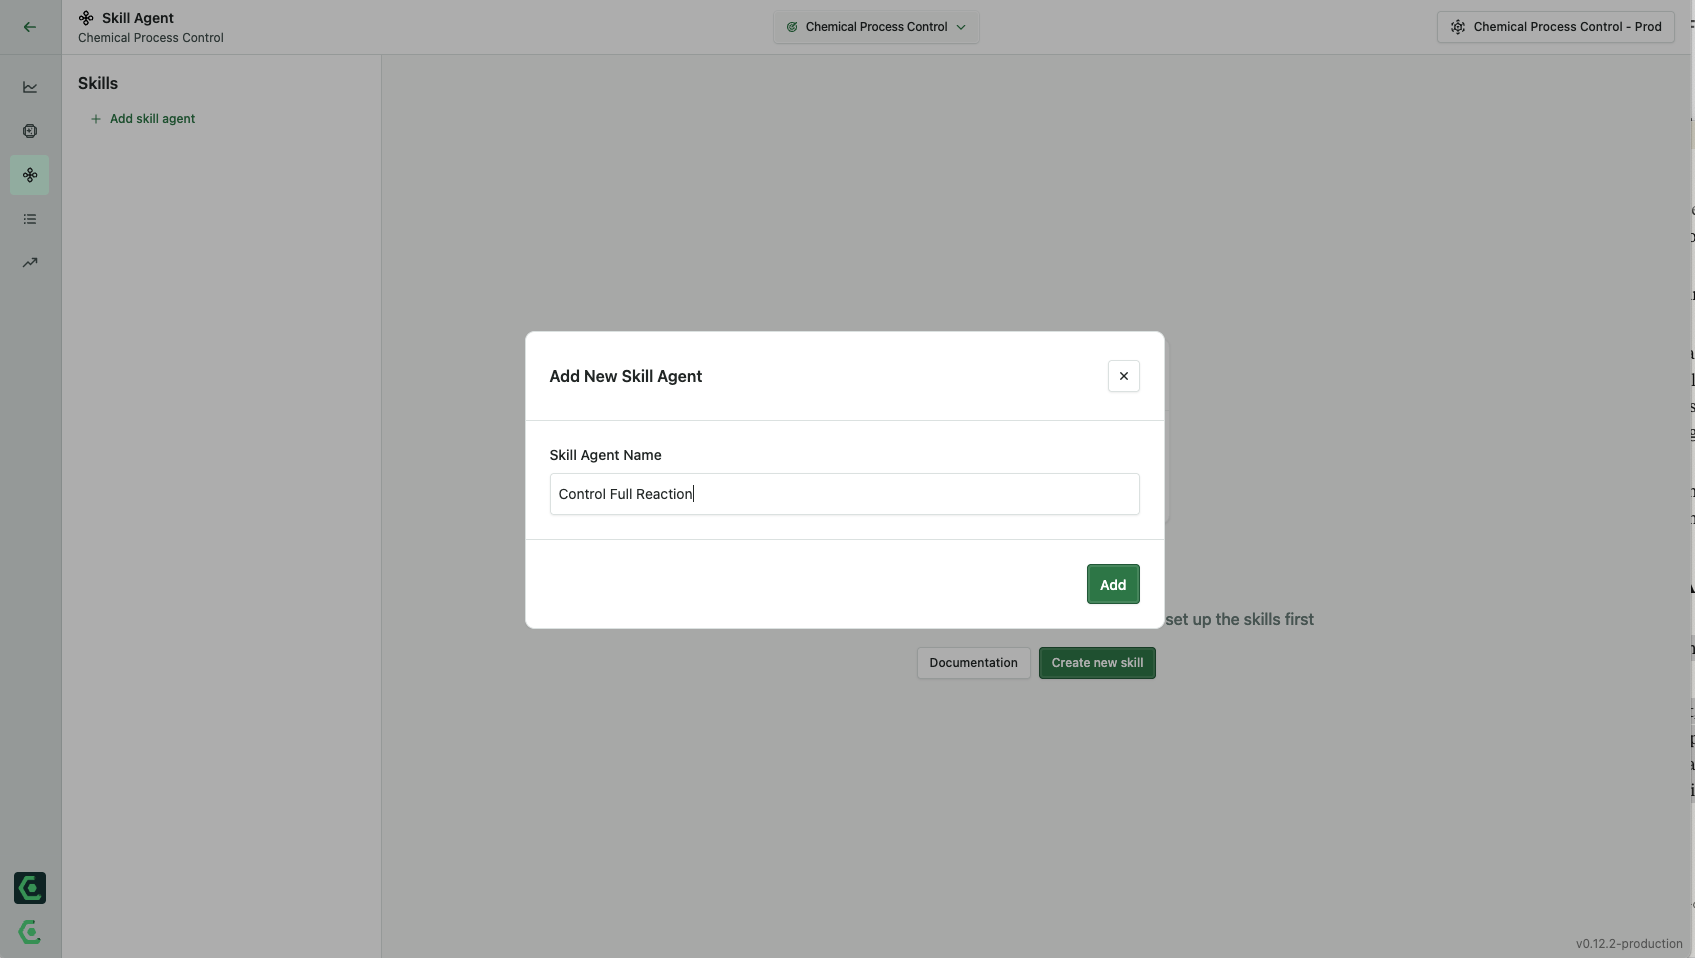
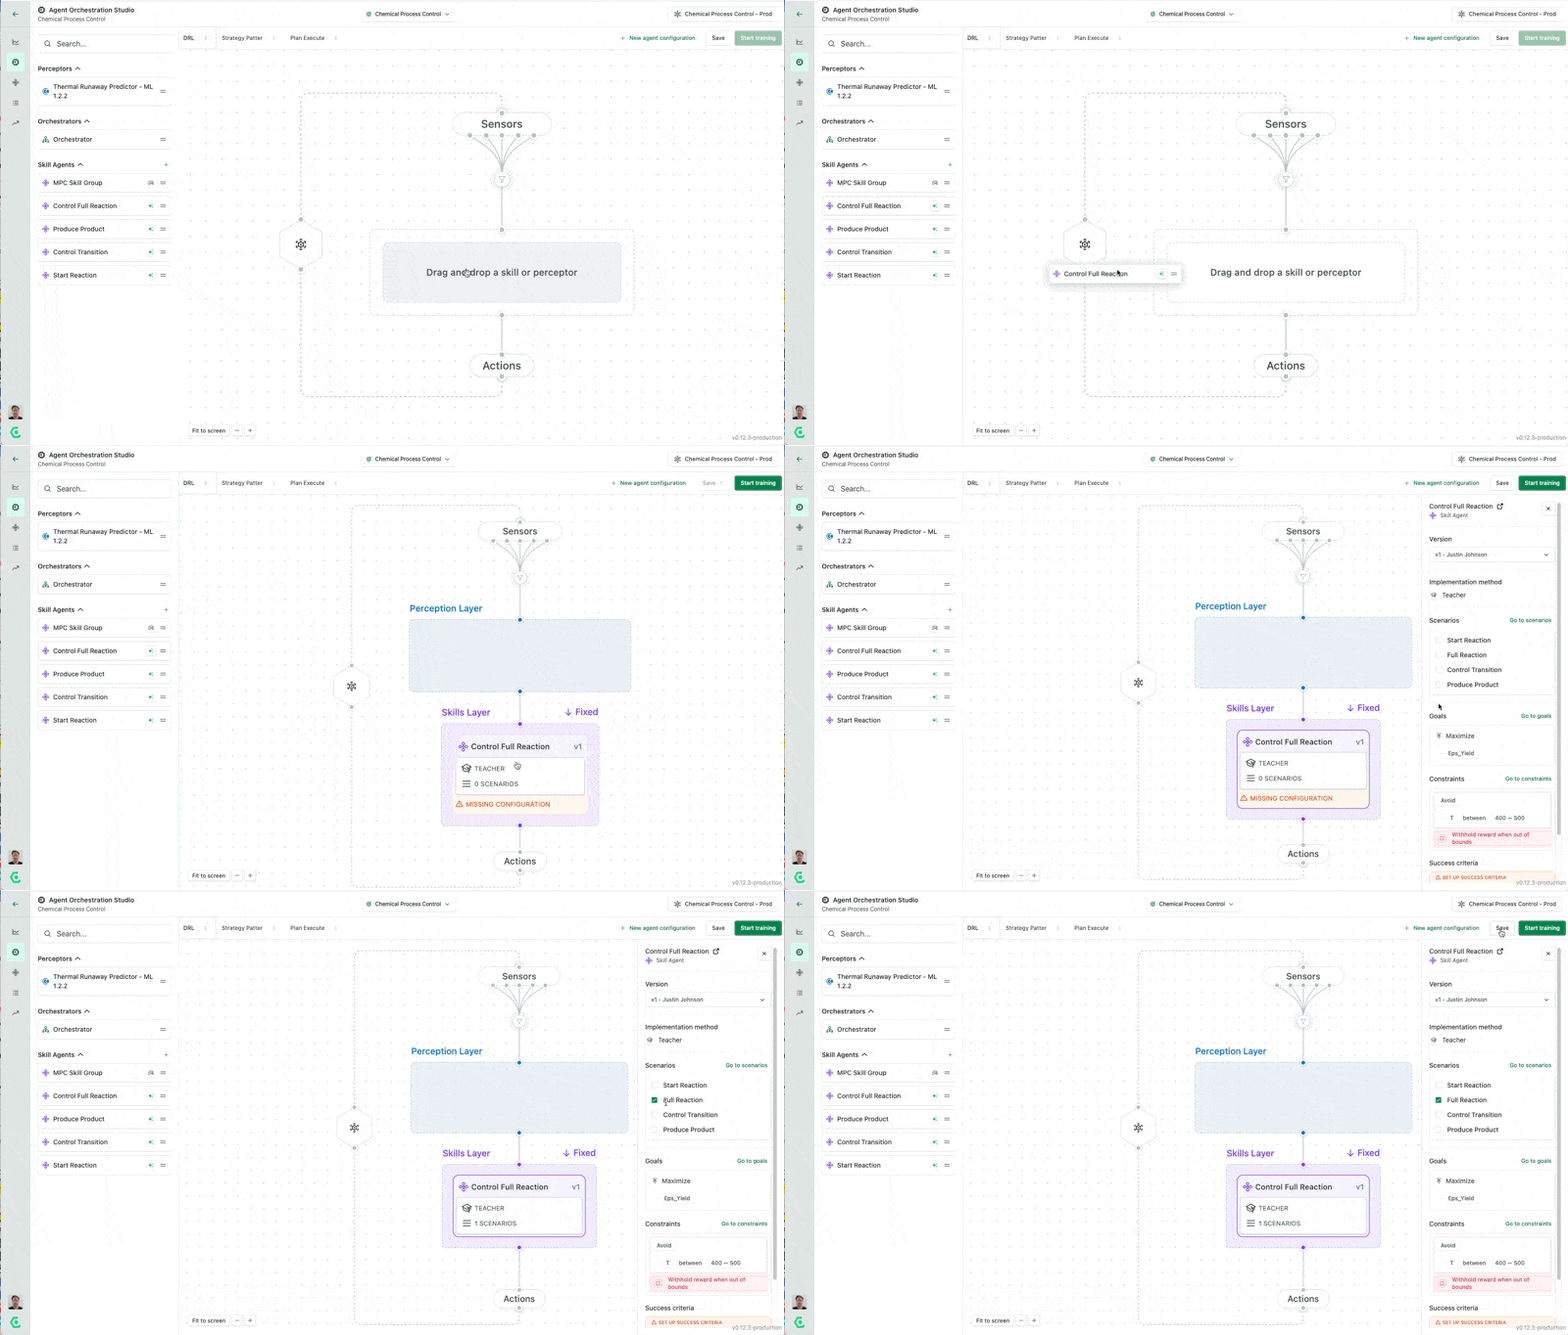
This agent system has a single-skill agent called `Control Full Reaction`. To create this skill in the UI go to the skill agent page and click `Create new skill agent`
## 2. Set skill agent goals and constraints
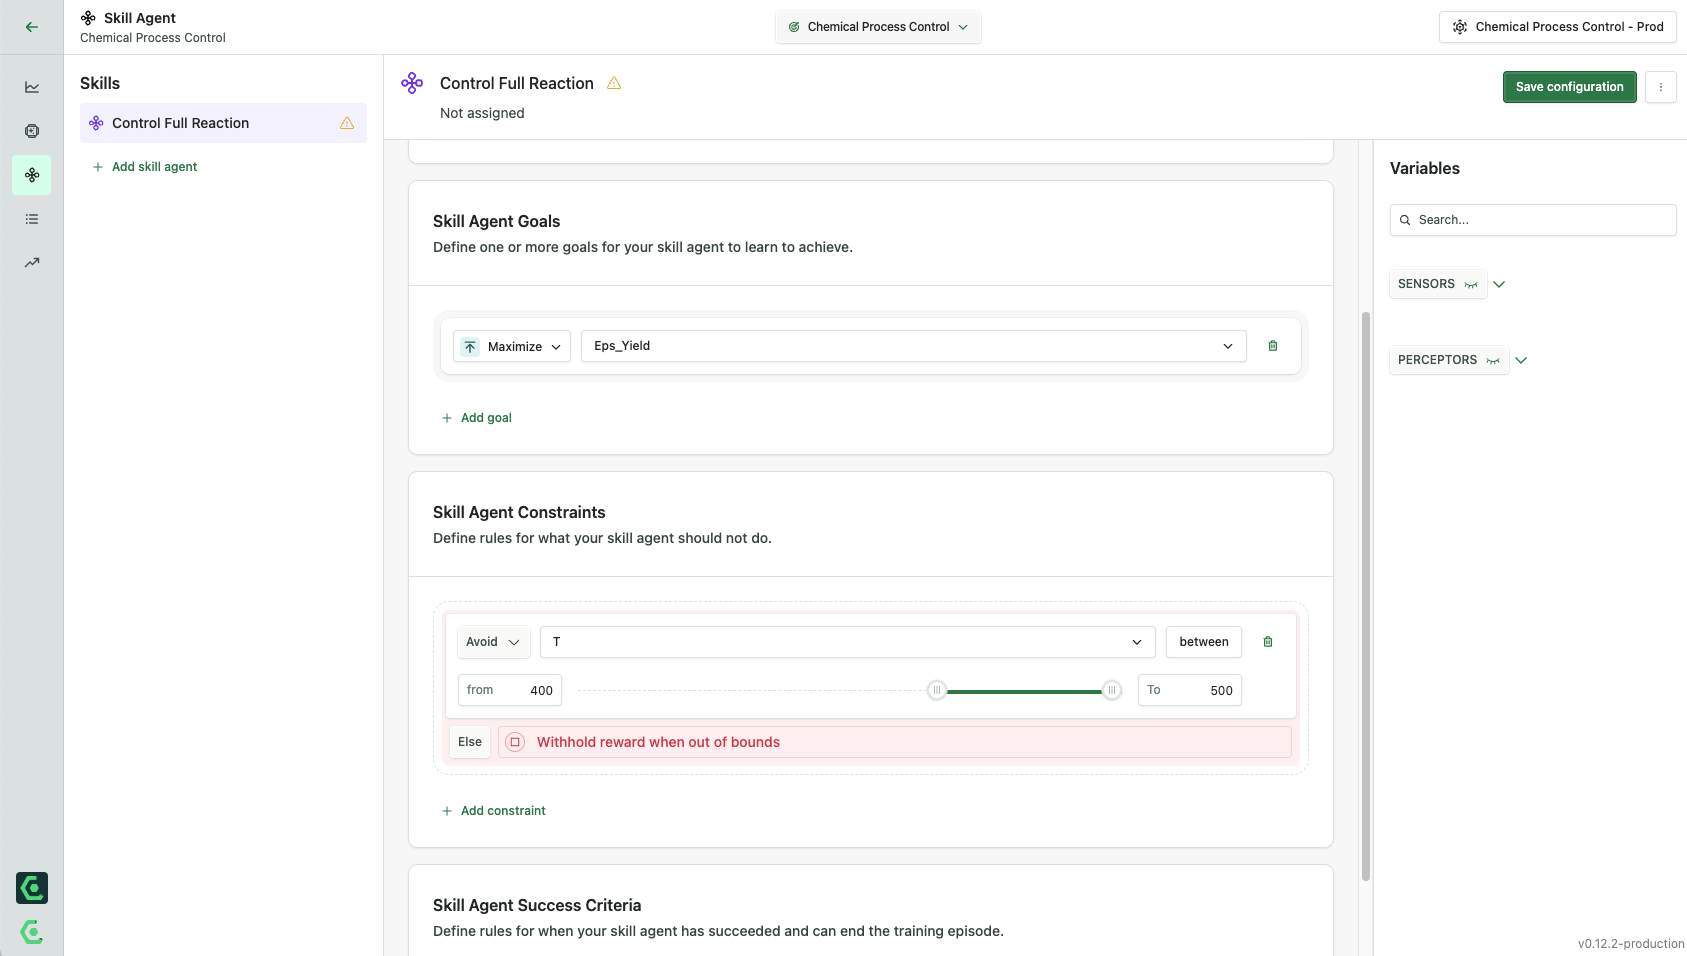
Configure your agent to set the instructions for its training sessions. This agent has one goal, to maximize yield, and one constraint, to keep the temperature from going above 400 degrees Kelvin.
1. Click `Add goal` In the left drop-down menu, select Maximize, and in the right one, select `Eps_Yield` . This means the agent will train with the goal of maximizing the total product produced by the end of each episode.
2. Click `Add constraint`. In the left drop-down menu, select `Avoid` , and in the right one, select `T` . After you select `T` you're going to see a slider appear for you to set boundaries you want to train the system to avoid. In this case, we want to set the boundaries from 400 to 500.
3. Save your skill agent configuration and return to the Agent Orchestration Studio.
## 3. Create a Scenario
Set scenarios to tell each skill agent what specific conditions or phases of the process to practice in. This skill agent controls the full reaction, so it needs to practice with the reaction as a whole.
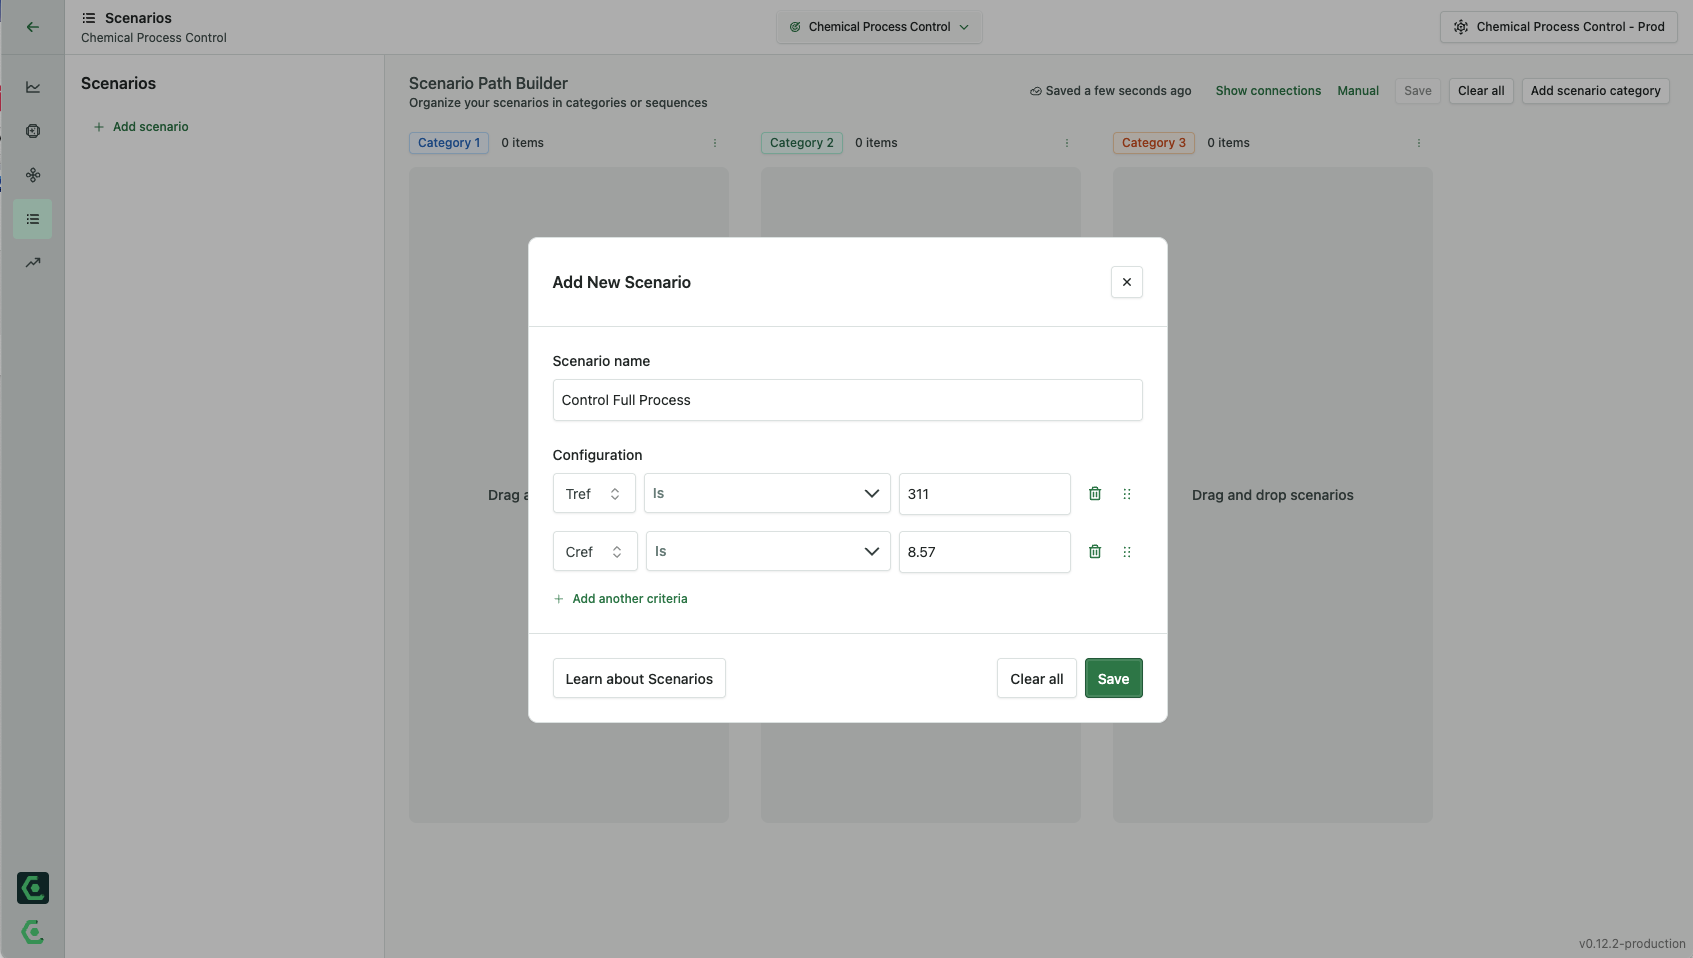
Go to the Scenarios page and select `Add scenario`, then name it `Control full reaction` and click `Save` . We're going to add two criteria to this scenario, and they are a reference temperature and concentration.
Control Full reaction: Cref Is 8.57, Tref Is 311 | [Why these numbers?](#user-content-fn-1)[^1]
## 4. Add the Skill Agent to Your Agent Configuration
Drag the skill `control_reaction` that you can now see on the left-hand side of your project onto the skills layer. Click on the skill agent once it's in the skill layer and assign the scenario.
## 5. Run Your Training Session
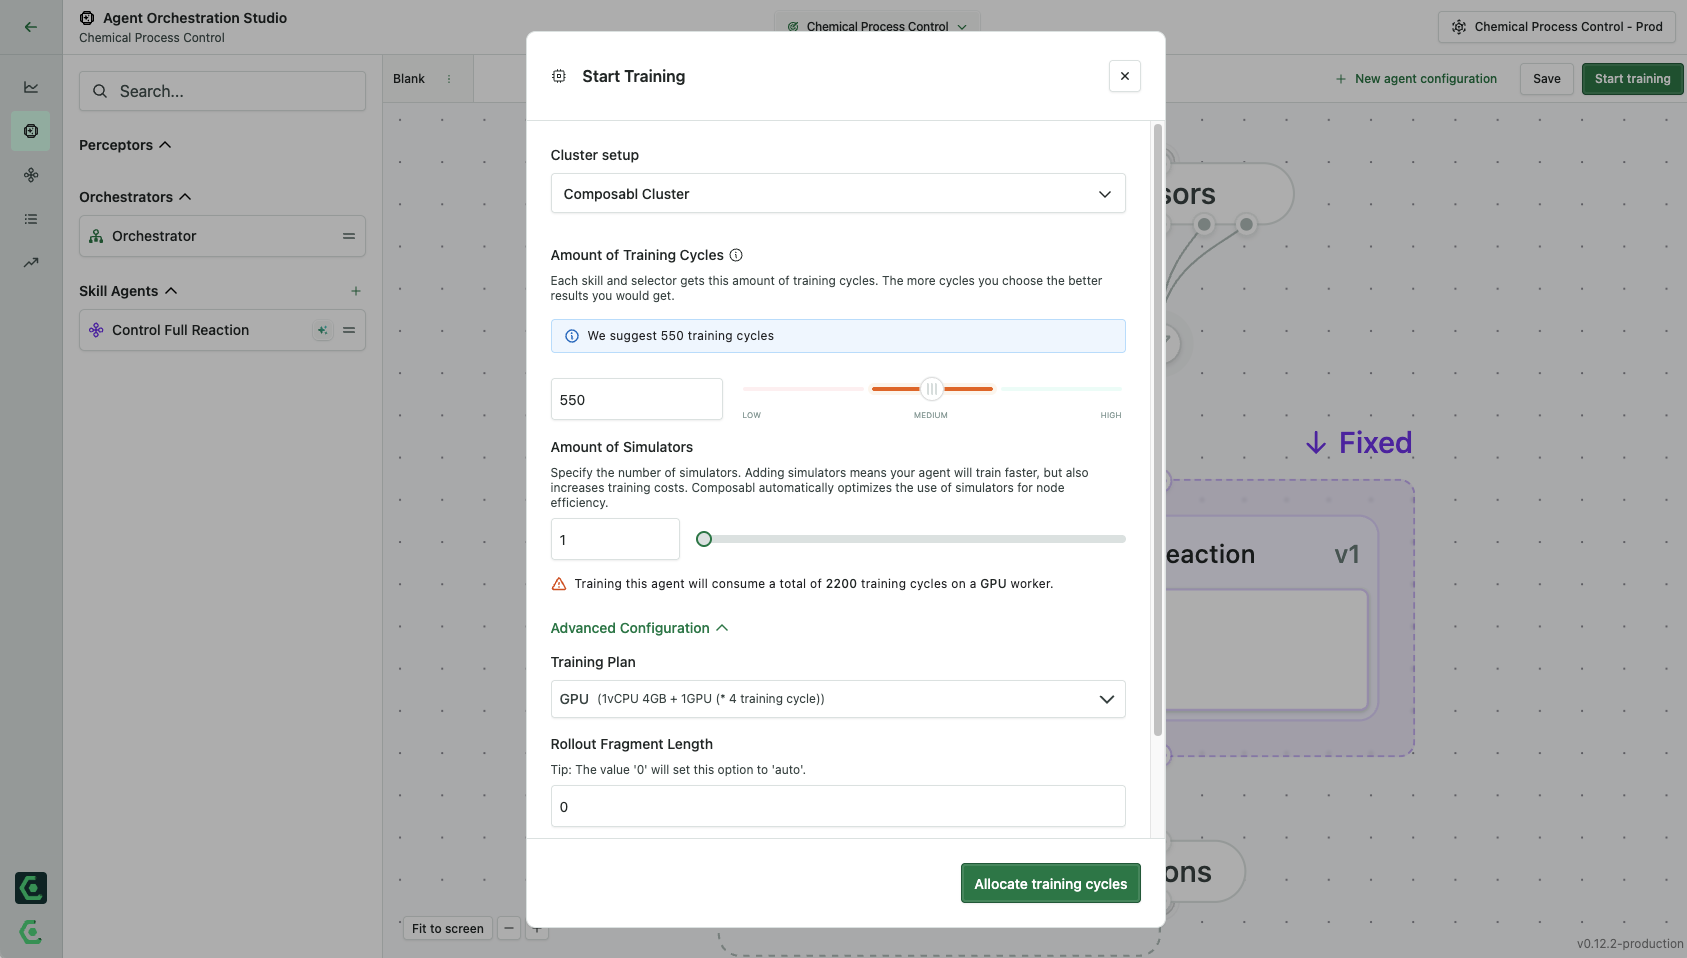
Now, we are ready to train your agent and see the results. First, select our built-in training cluster or one you own and have connected to the platform. Then set the number of cycles. For this tutorial, we suggest running 50. You can run multiple simulations in parallel to speed up training time. Under advanced, you can use GPUs instead of CPUs, set a rollout fragment length, and set the number of benchmark runs.
Once you have everything configured, click `Allocate training cycles` . This agent system design has only one agent, so all training cycles will be allocated to our DRL agent. In a multi-agent system, you can assign a different number of training cycles to different agents depending on the complexity of the skill.
## 6. View Results
When the training has been completed, you can view your results in the training sessions tab in the UI. This will show you information on how well the agent is learning.
You will likely see a steep learning curve as the agent experiments with different control strategies and learns from the results. When the learning curve plateaus, that usually means that the skill is trained.
## Analyze the DRL Agent's Performance
**Conversion rate**: 90%\
**Thermal runaway risk**: Low
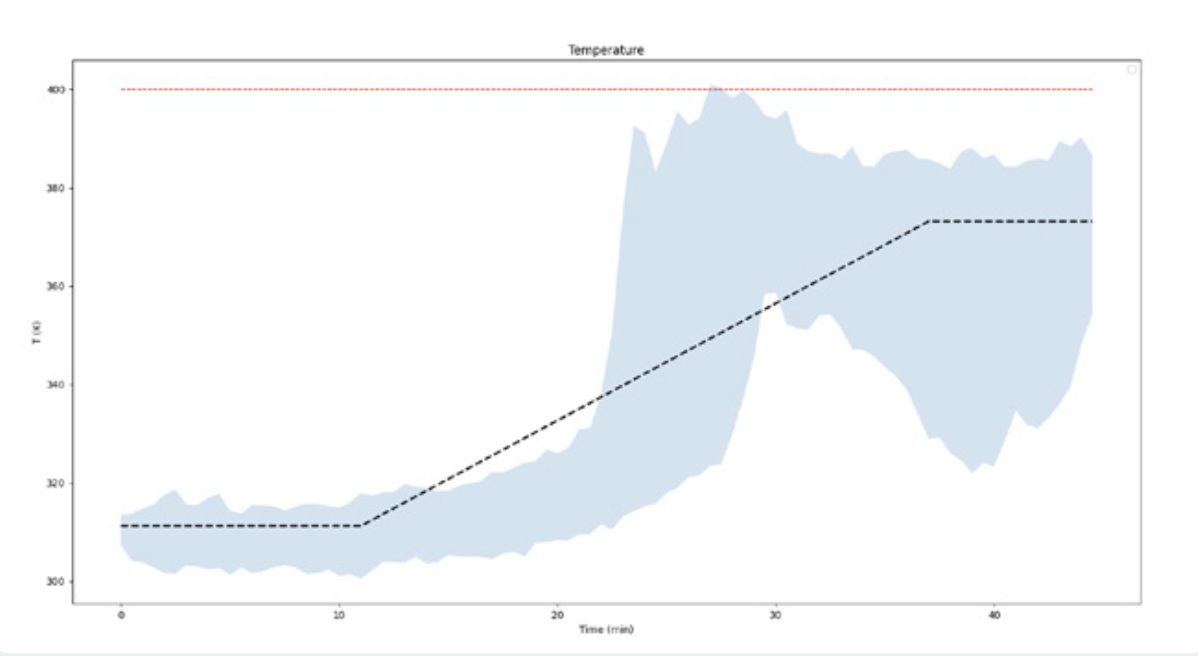
We tested this fully trained agent and plotted the results.
The DRL agent system performs well. Its relatively thin shadow means that it performs consistently over different conditions and stays within the safety threshold almost every time.
This agent controls the initial steady state well, staying on the benchmark line. But during the transition, the DRL agent goes off the benchmark line quite a bit. It doesn't notice right away when the transition phase begins, staying too long in the lower region of the graph and then overcorrecting. That's because DRL works by experimentation, teaching itself how to get results by exploring every possible way to tackle a problem. It has no prior knowledge or understanding of a situation and relies entirely on trial and error. That means it is potentially well-suited to complex processes, like the transition phase, that can’t be easily represented mathematically.
However, its behavior is erratic because it can’t distinguish between the phases. The DRL agent’s skills do better than the traditional automation benchmark, but still leave room for improvement.
[^1]: These numbers represent the conditions at the start of the reaction. Full reaction is the default scenario for this simulator.
---
# Agent Instructions
This documentation is published with GitBook. GitBook is the documentation platform designed so that both humans and AI agents can read, navigate, and reason over technical content effectively. Learn more at gitbook.com.
## Querying This Documentation
If you need additional information that is not directly available in this page, you can query the documentation dynamically by asking a question.
Perform an HTTP GET request on the current page URL with the `ask` query parameter, and the optional `goal` query parameter:
```
GET https://docs.amesa.com/tutorials/industrial-mixer/deep-reinforcement-learning.md?ask=&goal=
```
`ask` is the immediate question: it should be specific, self-contained, and written in natural language.
`goal` is optional and describes the broader end goal you are ultimately trying to accomplish on behalf of the user. GitBook uses it to tailor the answer towards what is most useful for that goal.
The response will contain a direct answer to the question and relevant excerpts and sources from the documentation.
Use this mechanism when the answer is not explicitly present in the current page, you need clarification or additional context, or you want to retrieve related documentation sections.